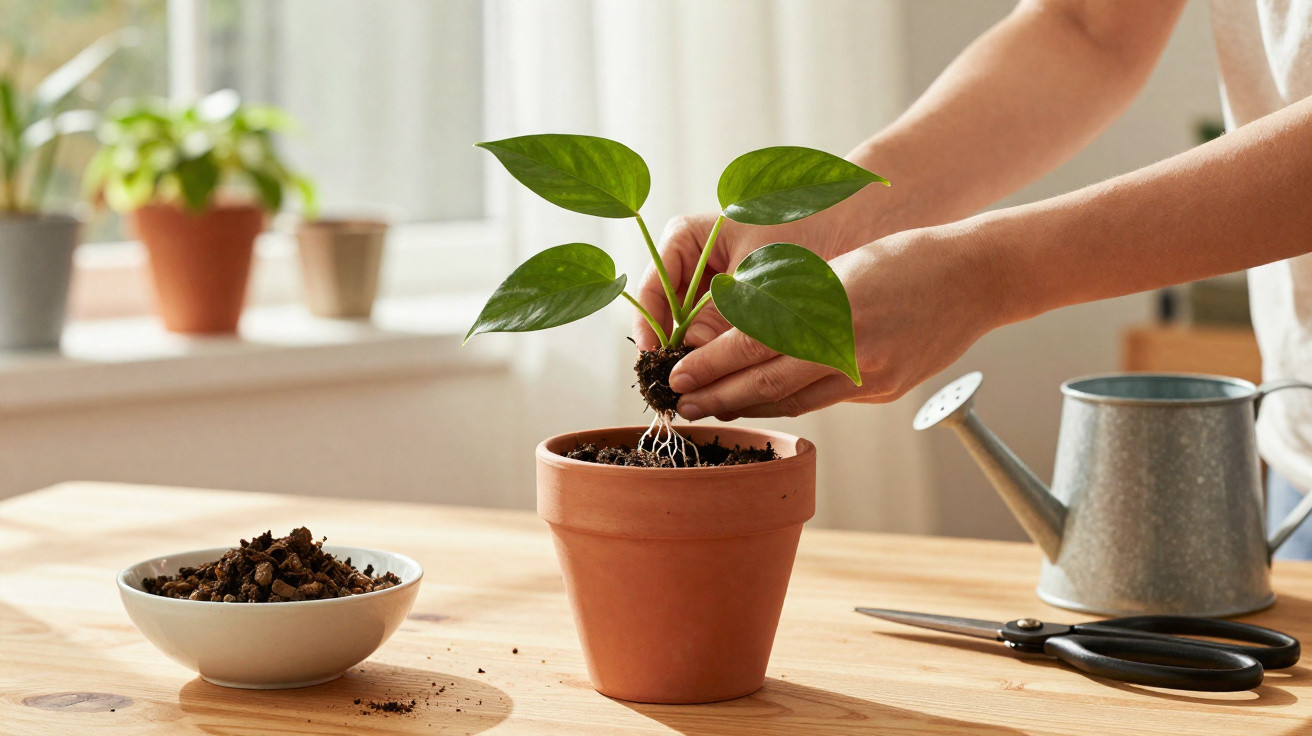
The leaves had looked perfect that morning.
Glossy, upright and almost self-satisfied, in the way only a flourishing houseplant can be. You had chosen a new terracotta pot, opened a fresh bag of compost and eased out the root ball exactly as every tutorial suggests. A quick root tidy, a light firming of the soil and one generous first watering. Done, you think. A fresh beginning.
Yet two days later, everything looks different. The leaves droop like wet washing, while the compost appears dark and dense. The plant that once welcomed you at breakfast is now slumped in the corner, seeming to regret the whole arrangement. You run through every step again, trying to work out what went wrong.
Your thoughts turn to pests, poor compost or perhaps a curse. Friends may shrug and say, “Oh yeah, plants sulk after repotting.” But why do certain plants return stronger while others fail to bounce back? The answer is usually found in the place you seldom see: beneath the soil surface.
Why your plant looks “dramatic” after repotting
Repotting alters almost every part of a plant’s familiar world in one afternoon. The angle of the light changes, the roots lose their established air pockets, water drains in a new way and the soil’s microbial life is unfamiliar. To us, it is a brief household job. To a plant, it is like moving home, starting a new job and replacing your mattress all on the same day.
Most houseplants do not truly “hate” being repotted. What they struggle with is the shock. Roots that were once snugly contained are suddenly surrounded by a broad, damp expanse of fresh compost. Water behaves differently, and oxygen moves through the mix in new patterns. The plant must direct energy towards adapting to these conditions instead of producing fresh leaves.
Social media is full of posts about “sad plants after repotting”. A London shop owner told me that almost half of the concerns raised by new plant parents involve leaves drooping within a week of a pot change. One woman brought in a peace lily that had turned from lush to limp within four days. She believed it was diseased. In fact, she had transferred it from a close-fitting plastic nursery pot into a vast decorative container “so it has room to grow”. Its roots were effectively swimming in sodden compost.
This happens often. At first, the plant can appear fine because its compost is wet and its leaves still contain plenty of water. Soon afterwards, however, the root system begins to suffer. In an oversized pot, moisture remains for much longer than young roots can tolerate. A handful of roots rot, followed by several more. Lower leaves start to yellow, tips go brown and the plant seems to let out a slow-motion sigh.
From a botanical perspective, most problems after repotting are caused by one of three things: root damage, an excessively large pot, or an abrupt shift in moisture and oxygen around the root zone. Delicate feeder roots are remarkably fragile. Even a well-intentioned “root massage” can snap hundreds within seconds. When they are lost, the plant is less able to take in water and nutrients. Add a larger pot, which can retain more water and less air, and the roots end up in oxygen-poor conditions. That is when rot-causing organisms have their opportunity, while the growth above the soil begins to show signs of trouble.
How to repot plants without breaking their spirit
The gentlest repotting process is often rather unexciting. Choose a container only one size larger - generally 2–3 cm wider than the existing pot, rather than making a dramatic jump. Check that it has a drainage hole; without one, it is decoration rather than a proper plant pot. Put a shallow layer of compost mix in the bottom, then remove the plant by tipping its old pot while lightly supporting the stem, never by pulling it out.
Leave most of the root ball undisturbed. Remove only the compost that falls away freely; do not cut into the roots as though carving a Sunday roast. Position the plant so that its previous soil level is at the same height in its new container. Fill around it, gently tapping the sides to settle the compost instead of forcing it down. The aim is to retain small air spaces, not create a compacted block.
Once repotted, water slowly just once, until water comes through the drainage hole. Then pause. Allow the plant time to recover before watering again. Return it to the place where it was already growing contentedly, rather than “giving” it a completely new position beside a sunny window. Familiar temperatures and light levels support recovery. Think of it as changing homes while remaining in the same postcode.
In practical terms, the most frequent errors tend to come from good intentions. People repot too regularly, pick pots that are much too big, or replace the compost with a rich, waterlogged mix because it seems as though it “must be good”. Plants that already appear thirsty, pale or stressed are often repotted in an attempt to “save” them, even though they may be too weak to cope with another disruption.
We have all seen a tired-looking plant and immediately wanted to give it everything: fresh compost, a new pot, more water and a different place by the window. From our side of the pot, that rush of changes feels helpful. From the plant’s perspective, it is disorder. The light, microbes, moisture patterns and airflow have all changed. Each factor can be manageable by itself, but together they become a challenge.
Let’s be honest: nobody genuinely does all this every day. People do not routinely inspect root colour, tailor substrates to each species or calculate precisely how much larger a pot should be. Most of us grab half an hour on a Sunday, lay a plastic bag across the kitchen floor and hope for the best. That is why a few simple boundaries are useful. Repot only when roots are tightly circling or water runs straight through the pot. Keep the light unchanged. Water sparingly to begin with. Make one change at a time.
“The best repot is the one your plant barely notices,” says an indoor grower I met in Manchester. “If it looks exactly the same a week later, you’ve done it right.”
There is a calm confidence in this method. Rather than pursuing instant “after” photographs, you take the long view. You observe leaves over weeks rather than hours, and acknowledge the delay between what roots experience and what the foliage reveals. A plant is not a project; it is an ongoing, slow conversation.
Keep these straightforward checks in mind when repotting.
- Select a pot one size up with drainage, rather than taking a huge leap.
- Choose a free-draining mix suited to your plant type.
- Disrupt the roots as little as you can, avoiding forceful teasing.
- Water deeply once, then allow the mix to dry out partly.
- Return the plant to the same location for at least 2–3 weeks.
Letting your plants recover – and reading their signals
Once the compost has settled and you have cleared away the mess, the important work continues unseen. Your plant is repairing microscopic root tips, creating new connections and adjusting the amount of water it draws upwards. At this stage, restraint is surprisingly effective. Avoid the temptation to keep prodding, turning, feeding or “fixing” it. Consistency is the treatment.
Allow for a slight decline. You may see one or two yellow leaves. Some plants, including fiddle-leaf figs and calatheas, respond to any interruption like drama queens. That does not necessarily mean you have failed. Instead, look for gradual, understated signs: a sturdy stem, leaves that remain plump and emerging growth points that stay green rather than drying out. These details indicate that the roots are quietly doing their work.
Once you begin to view repotting as a collaboration rather than a rescue mission, everything becomes easier. You stop faulting yourself for every floppy leaf and start recognising patterns. That collapsed peace lily? Perhaps the pot was too large, rather than your care “skills” being at fault. The thriving monstera? Perhaps you barely disturbed its roots. Over months, these small lessons accumulate, until you realise that you are not simply “bad with plants”. You had just not known the script concealed in the soil.
Plants have their own rhythm, after all. Repotting can test patience as much as it tests gardening ability. But when a delicate plant you had nearly abandoned sends up a new leaf through fresh compost, the narrative changes completely. That tiny green curl shows that stress is not always a catastrophe. Sometimes, it marks the beginning of a stronger, deeper root system that you will never see, but that your plant may depend on for years.
In a world fixated on immediate transformations and immaculate before-and-after images, allowing repotted plants to recover slowly and out of sight feels quietly radical. Sharing the full account - the droop, uncertainty, waiting and recovery - may help fellow plant owners more than another perfect photograph. The next time you hold a pot in one hand and a root ball in the other, you will understand what is truly involved: not merely a new container, but how carefully you handle the shock between old and new.
| Key point | Detail | Benefit for the reader |
|---|---|---|
| Choosing the right pot size | Go up by one size only, using a pot with a drainage hole | Reduces the risk of root rot and water stress |
| Minimising root stress | Remove only loose compost and avoid breaking fine feeder roots | Helps the plant recover faster after repotting |
| Keeping the environment stable | Maintain the same light conditions and water moderately at first | Lessens the overall shock and “dramatic” leaf reactions |



Comments
No comments yet. Be the first to comment!
Leave a Comment